

How To Record Screen And Sound On Windows 10
Accept you ever wanted to record your screen on Windows, but were frustrated by the limitations of born tools? Odds are that if yous've tried using a basic tool, you've struggled with one or more of the following obstacles:
- Y'all can't tape file menus or dropdowns
- You can only tape i window at a time
- You tin't add effects or callouts
- You tin can't record your audio simultaneously
- You tin't add music or groundwork sound
Luckily, there'due south a better way. Nosotros'll walk you lot through two great tools that can assistance you record your screen on Windows 10 and add the elements y'all need.
Windows Screen Recording Software
Download one of our gratis screen recorder trials to quickly and hands record your computer screen on Windows.
Download Your Free Trial
Read on to larn how to record your screen on Windows. Click here to learn about screen recording for Mac.
How to make a unproblematic screen recording on Windows 10
If you're looking to only bear witness a process or walkthrough that doesn't require much editing, consider looking for a screen capture tool like TechSmith Snagit that has easy-to-use features for bones trimming and editing.
These types of screen recordings are great for off-the-cuff videos that explicate information to others. Most of the fourth dimension, these are the types of recordings you'll make. Plus, the all-time thing about them is that they take mere seconds to create!
We'll walk you through each step needed to capture your screen on Windows 10 using Snagit.
Simple Windows screen recording with Snagit
Download a complimentary trial of Snagit today to easily create and share uncomplicated screen recordings.
Download Your Free Trial
Step one: Choose what you want to record
Capturing video this Snagit simply takes a few clicks.
Start, open Snagit and select the video tab from the Capture Window. Make certain Region is selected from the drop-downward.

And then, hit the large red Capture icon.
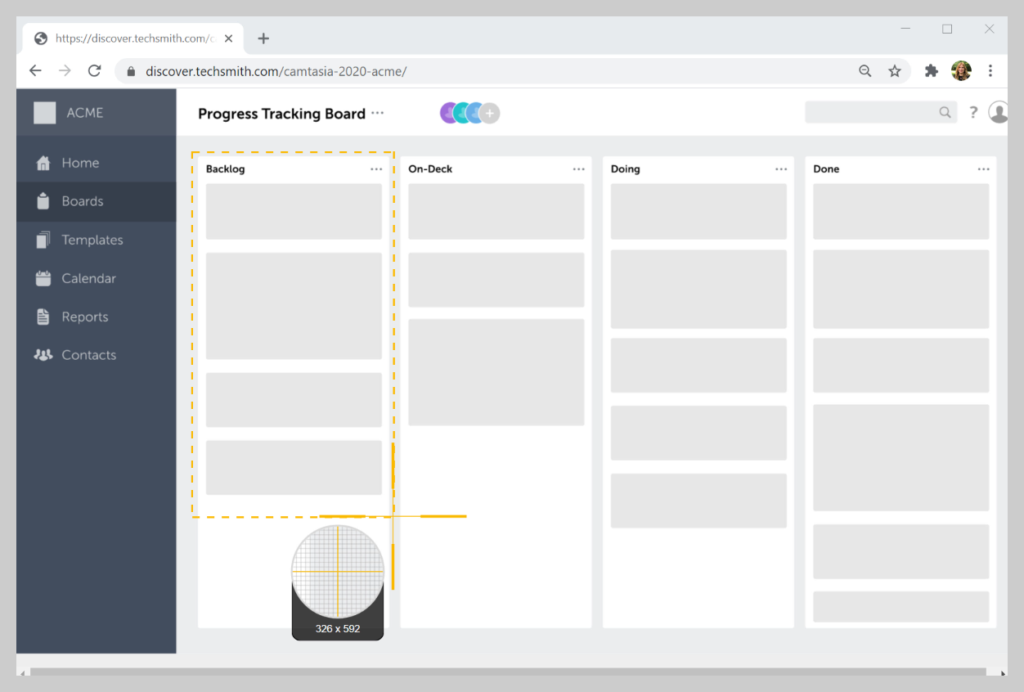
The Snagit crosshairs will announced. Utilise them to select an area to record.
The selection will automatically snap to the windows yous have open. Pretty sweet, right? If you desire to manually select a region, merely click and drag the crosshairs.
Step 2: Choose sound to record
With your region selected, it's time to cull your sound record settings.
To record your voice, select the Record Microphone option. If yous desire to tape the sounds that come from your calculator besides, like notifications, make sure to select Tape System Sound.

Step three: Get-go your screen recording
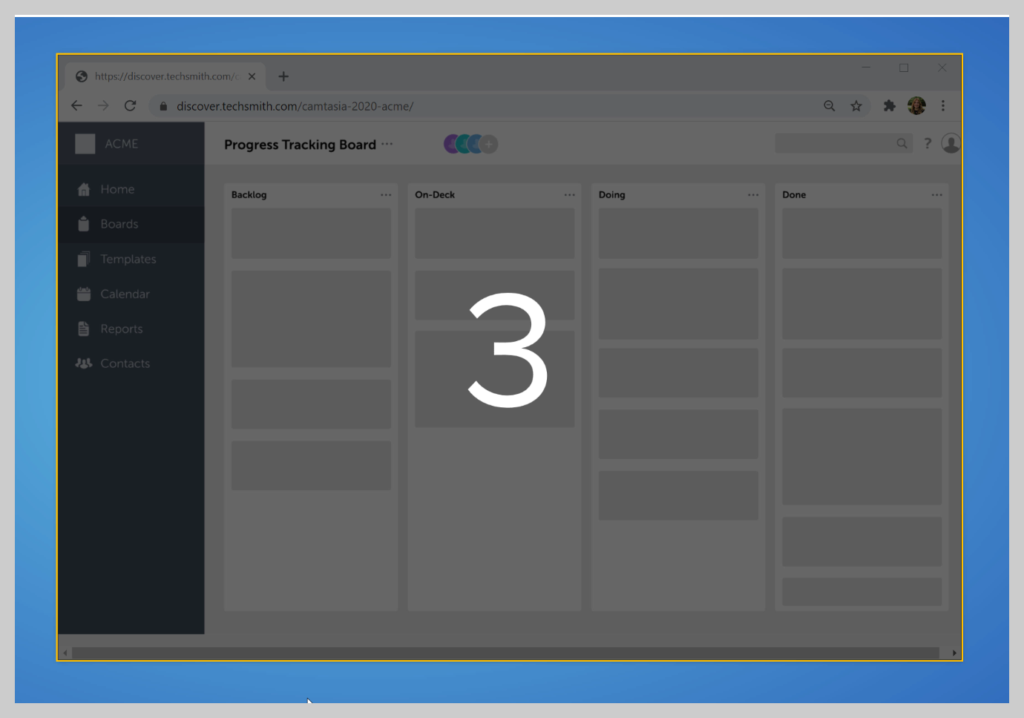
When you lot're fix, click Record, and Snagit will give you lot a three second countdown. Now, annihilation that appears in the recording surface area is captured.
If you want your viewers to see your confront, which can help heave date, click the webcam push button to toggle between recording your webcam or your screen. When finished, click the suspension button to bring up the recording controls.

And then, click stop.
Footstep 4: Trim your video
Once yous hit stop, your video appears right on the sheet and is ready to share.
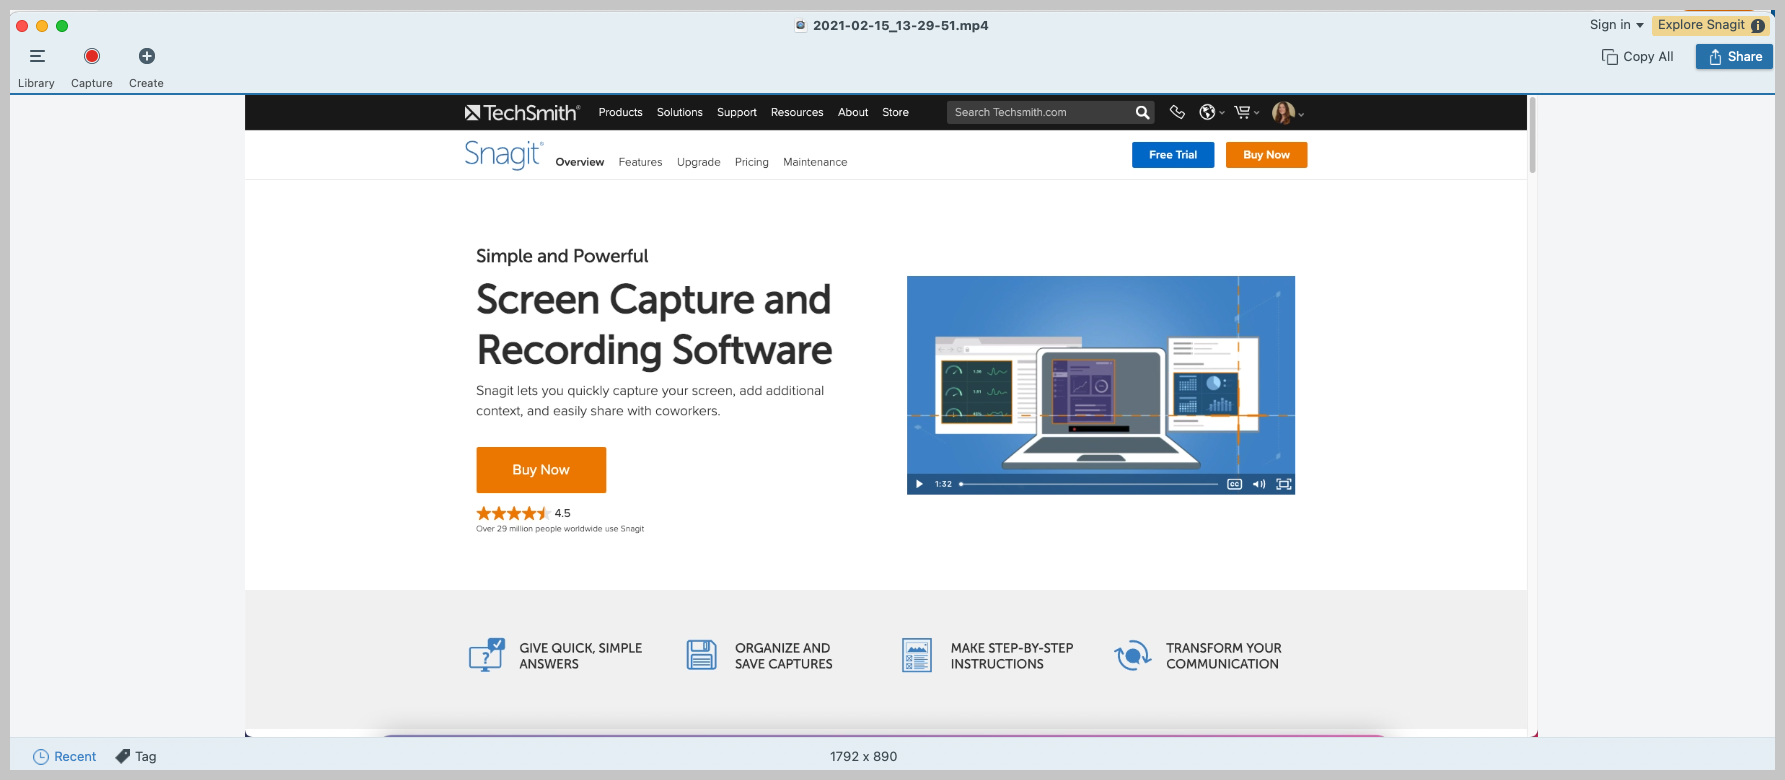
No waiting for rendering. No waiting for that loading bar. The video is all set up!
Of course, in one case you're finished with your screen recording, you'll probably desire to edit it a little. Even the virtually carefully planned recordings will likely take something you want to remove. With Snagit, you tin easily trim your recording to remove unwanted pieces.
If you find mistakes or parts you desire to remove, make a selection with the playhead, and click cut.

If you notice yourself needing more in-depth, high-tech video editing than Snagit offers, you should check out Camtasia.
Snagit is simple, gets the job done, and is piece of cake to employ for Windows screen recording.
Pace 5: Salvage or share
When you're finished with your video, click Share, and choose the destination that's all-time for you. If yous're not certain what to choose, we recommend TechSmith Screencast.
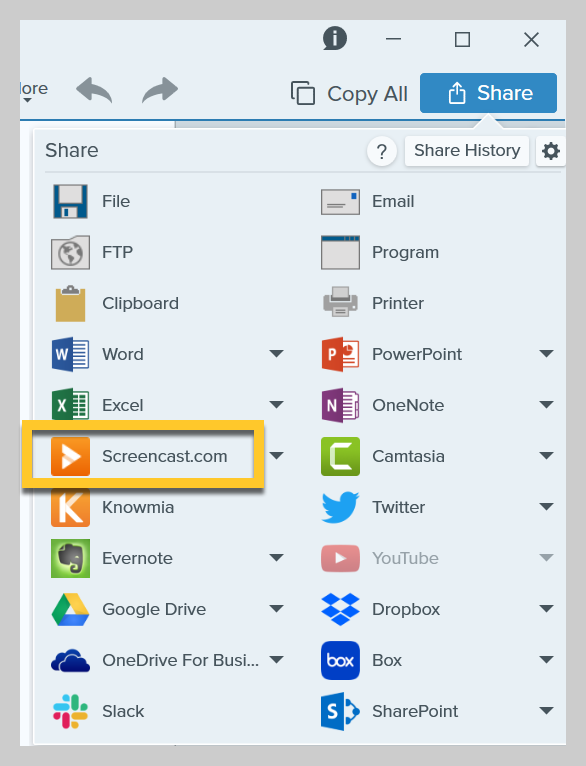
Screencast gives yous an easily shareable link that you can paste in an electronic mail, Slack channel, or whatever other communication platform. Plus, it'due south costless!
If you lot want to do more than editing of your videos or want to create a more high-quality screen recording with Windows 10, we recommend Camtasia, the all-time all-in-one screen recording and video editing software available.
How to make a professional-quality recording on Windows 10
While the majority of screen recordings don't need to be overly circuitous, sometimes you'll want to add features like annotations, effects, animations, in-video quizzing, and more. For more professional-quality videos, we recommend a screen recording tool like TechSmith Camtasia that has hundreds of editing features to give your screen recordings a professional, polished experience.
Only don't exist intimidated past Camtasia's features; it's withal incredibly easy to utilise.
Nosotros'll walk you lot through each step needed to record your screen on Windows x using Camtasia.
Elementary Windows screen recording with Camtasia
Download a free trial of Camtasia today to first creating polished and professional-looking screen recordings.
Download Your Free Trial
Pace 1: Choose your recording options
To start a recording later you open Camtasia, click the Record button at the top of the tools panel.
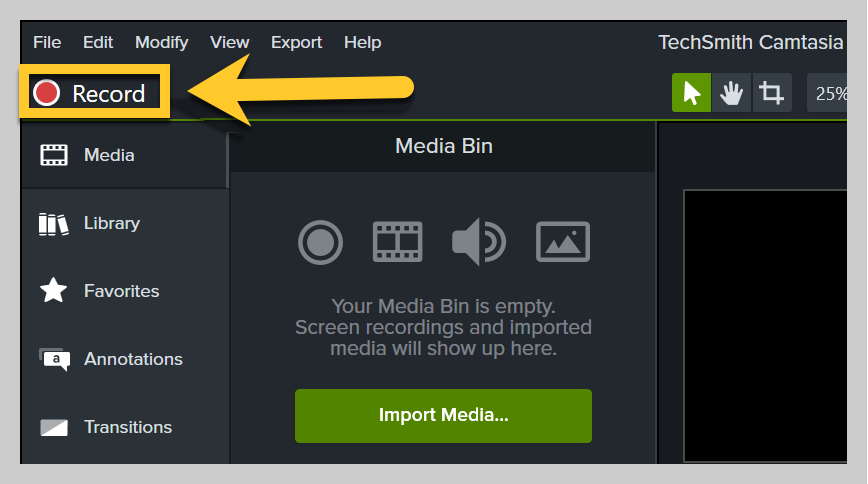
This opens the Camtasia recorder, which is automatically set to capture everything that happens on your screen. This is essentially the control center for your screen and audio recordings.
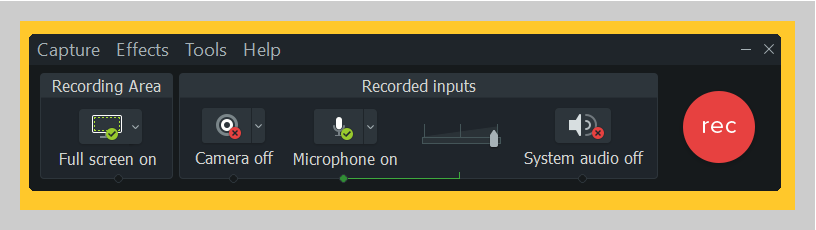
The Camtasia recorder allows yous to customize the controls for your recording.
Step two: Select the region you lot want to record
Start by selecting a recording expanse that only includes the relevant screen content you want to tape.
For some purposes, it may brand sense to record your unabridged screen. However, if you're only showing the steps necessary for a detail piece of software or where to click on a website, yous may want to cull to record only that window (or a portion of information technology) rather than the entire desktop.
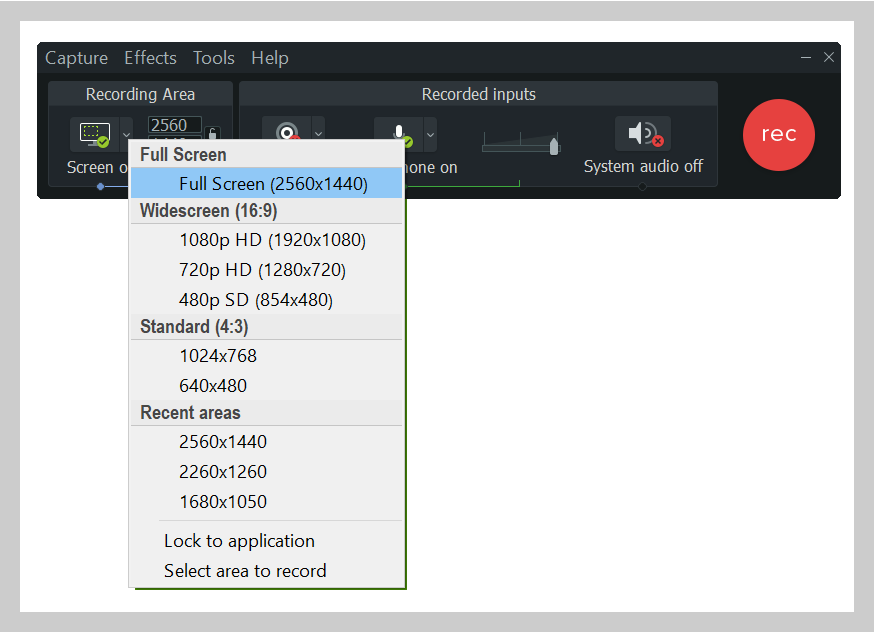
You tin choose to record the full screen or select a custom region to record.
Pro tip: If y'all're doing a full-screen recording, it's a good idea to clean up your desktop a bit to ensure in that location is nothing distracting or unwanted in your video.
Stride three: Record your audio
If y'all're narrating your recording, having a script (or at to the lowest degree some talking points) is a expert thought to ensure y'all stay on runway and cover the necessary material.

For now, just choose which microphone yous want to record from. You can besides choose to tape the system sound from your reckoner. When you're ready to end the recording, click the Camtasia recorder icon in the taskbar.
Footstep four: Edit your video
Camtasia comes with a built-in video editor, and information technology but takes a few steps and some unproblematic video editing tips to go the polished look y'all want.
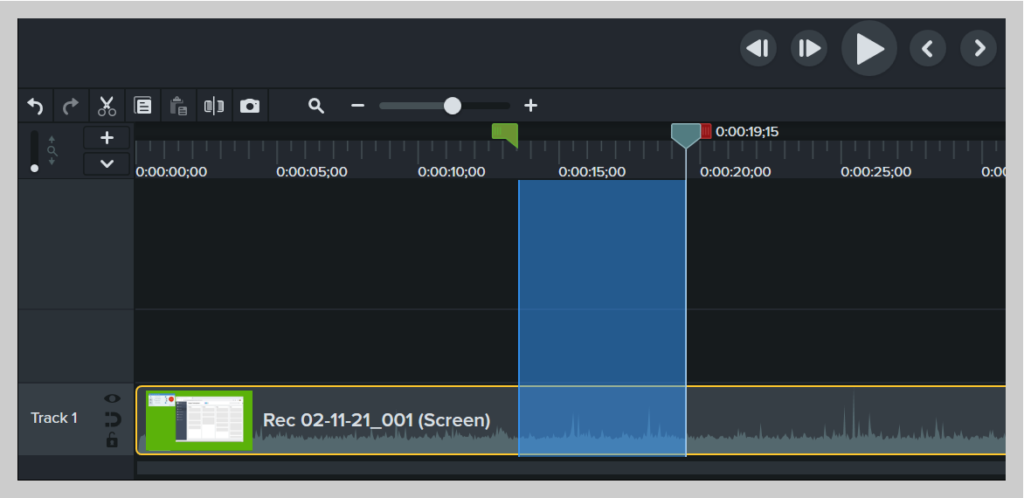
To start, cutting out mistakes past selecting them with the playhead, then clicking cut. To trim actress footage from the ends or your recording, elevate the end of the prune in.
From there, you lot can add together any desired furnishings or features.
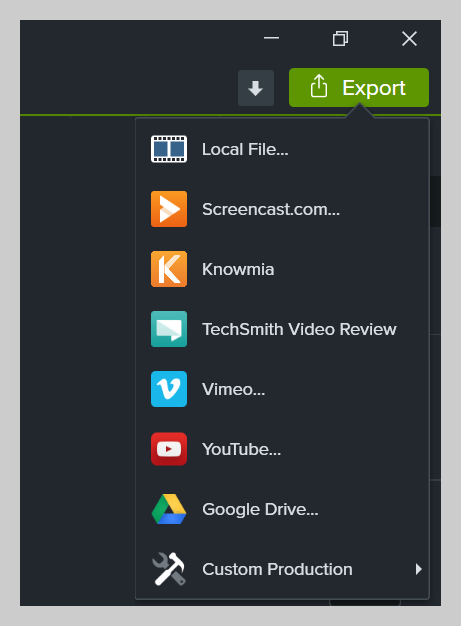
Pace 5: Produce and share
Finally, consider where your video volition live. There are many video hosting options to cull from these days. Yous can share your video to an online video platform like YouTube, Vimeo, or Screencast, or you tin can choose to salvage the video as a local file. Y'all can also share direct to your favorite social media site.
We've institute that most of our users like to store finished videos on YouTube, especially for external videos.
There you take it! You're ready to kickoff screen recording like a pro and produce clear communications for your audience. No more than scheduling Zoom sessions to walk a coworker through a process or having countless meetings with friends to explain a task. Simply send them a screen recording!
Windows Screen Recording Software
Download 1 of our free screen recorder trials to rapidly and easily record your computer screen on Windows.
Download Your Costless Trial
Oftentimes asked questions
How practise I screen tape on Windows with sound?
With Snagit and Camtasia, you can easily record your screen and audio either simultaneously or separately. Just follow the steps above for perfect sound every time!
How do I record my screen and myself on Windows?
To record both your screen and your webcam footage on Windows, just toggle the Record Webcam option in Snagit or Camtasia.
How do I record my iPhone screen?
While Snagit and Camtasia can't record your iPhone screen, TechSmith has a TechSmith Capture app that lets y'all speedily and easily record your iPhone screen. Afterward you download the app: Stride ane. Enable screen recording on your iOS device. Step ii. Set up your screen recorder. Footstep 3. Record your screen. You tin can then upload the recorded footage into Snagit or Camtasia.
How practice I record my screen and internal audio on Windows?
To record your screen and your calculator's audio, select the Record System Sound selection in Snagit or Camtasia.
Source: https://www.techsmith.com/blog/screen-record-windows/
Posted by: harterfien1940.blogspot.com
0 Response to "How To Record Screen And Sound On Windows 10"
Post a Comment